
Last month, we discussed selecting a fountain. This month, we’ll walk you through, step by step, how to install your new Air-O-Lator fountain.
Once you’ve picked out your aerating fountain for your pond or another body of water, make sure you have verified the voltage available, checked to make sure you have the proper circuit breaker and checked the total power cable required from the fountain to the circuit breaker to ensure that the properly sized wire is installed and ordered.
We strongly recommend that you have a certified electrician install and/or verify the electrical requirements. Air-O-Lator’s staff is always available to speak with you or the electrical installer to ensure the proper power and installation instructions are provided with your new fountain.
Air-O-Lator aerating fountains and decorative fountains are easy to install. All the fountains are provided with four components—the fountain assembly, power cable, controls, and float.
Follow the steps below to install your new Air-O-Lator fountain:
Step 1. Install the float. All the Air-O-Lator floats are square in shape with a hole in the center of the float used to install the fountain. Each corner of the float has a hole for installing/threading the mooring rope. There are two suggested mooring options: concrete block mooring or shore-to-shore mooring.
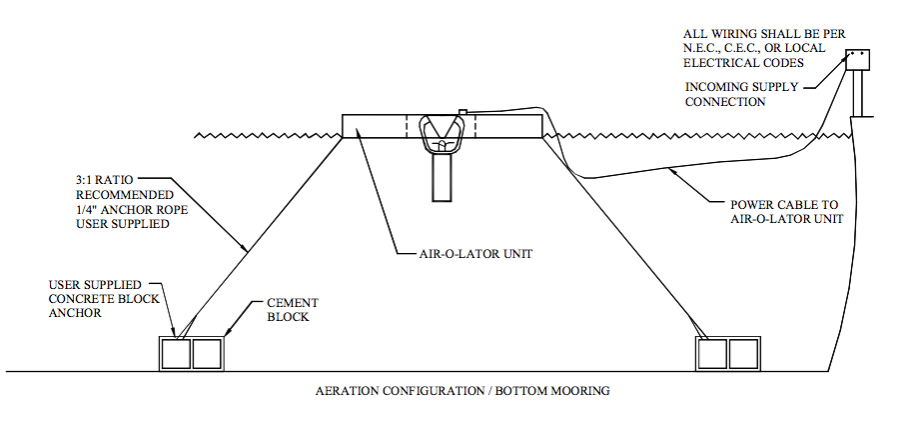
For concrete block mooring, two standard concrete blocks 8” x 8” x 16”, ¼” polyethylene rope are required. Cut two lengths of rope, allowing 2 to 3 feet of rope for every foot of water depth. Secure one end of each rope to the concrete block. Secure the other end of the rope to one corner of the float and the other rope to the opposing corner of the float. Lower one concrete block to the bottom and then lower the other block after stretching out the rope from the float.
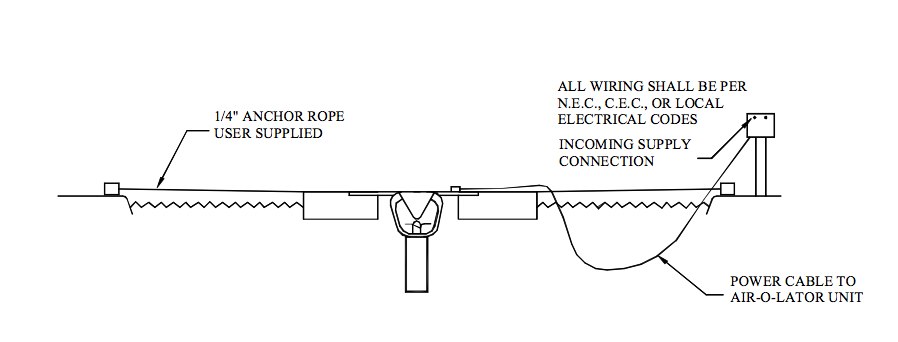
For shore mooring, secure the ¼” ropes to the opposing corners of the float and secure the ropes to a post on shore and another rope to the opposite shore and secured to a post. Allow enough rope on one end at the post to allow pulling the float to the shore.
Note: if you purchased a fountain lighting kit assembly with your fountain you will want to install the lights to the float before installing the float in your pond. (Follow the light kit installation instructions provided with your light kit.)

Step 2. Place the fountain assembly into the center hole of the float, motor-end first. Align the two motor arm brackets into the molded sockets on the float.
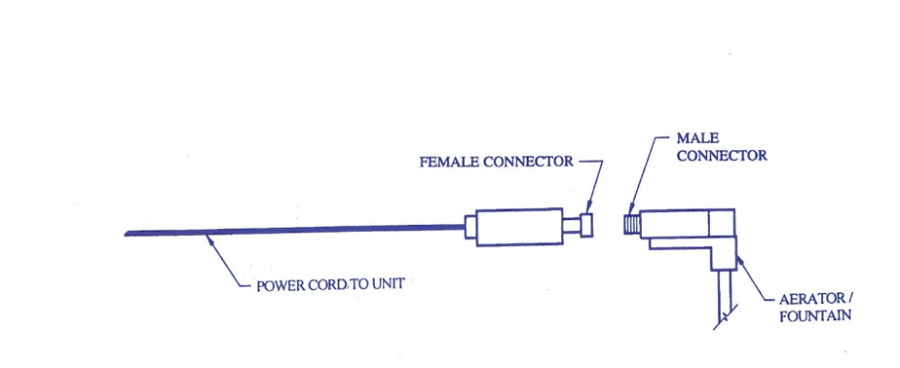
Step 3. Attach the power cable to the female connector end to the male connector of the float. Only hand tighten the jam nut; over tightening will damage the connector. Run the power cable back to the shore and allow the power cable to sink to the bottom of the pond.
Step 4. Connect the power cable to the controls provided.
Step 5. Install the incoming power supply from the circuit breaker into the controls.
Step 6. Apply power to controls. You’re almost done!
Step 7. With the fountain operating, check the amperage draw. This can be done at the circuit breaker panel. Record the voltage and amperage at start-up and keep with your operations and maintenance manual.
Step 8. Complete the warranty registration and mail to Air-O-Lator at 4401 E. 140th Street, Grandview, MO. 64030
Step 9. Sit back and enjoy your fountain.